


Bread Baking Photo Gallery
Published on: Sunday, 04 April 2021 13:25:04.
| 350 g_(12 oz) | almond flour |
| 150 g_(5oz) | gluten |
| 10 g_(1/2 oz) | wheat flour |
| 1 package | dry yeast |
| 1-2 tbsp | olive oil_(optional) |
| approx. 300 ml_(1 1/2cup) (1-2 Cup) | water |
| 1 tbsp | salt |
| 3 g_(0.1 oz) | coriander |
 | First, mix about 30 g of wheat flour with 2 packages of dry yeast. |
 | Now we'll add the warm water while stirring until a smooth paste forms. The consistency is correct when it flows slowly from the fork. |
 | Cover the whole thing with a tea towel and put it in the oven for 20 minutes at 120° F (50° C). During this time the dough will triple in volume. The yeast was busy! |
 | While the yeast is working, we can prepare the remaining ingredients. First, measure out the gluten and almond flour and sift them into a bowl. With the almond flour, which be buy from Buffbody, the sifter is unfortunately a necessity, since it has many coarse grains in it. (We keep the coarse grains and grind them again. This very fine almond flour is ideal for making pastry or cake.) |
 | I'm lazy and use a food processor to knead the bread dough. It's important that you mix all the dry ingredients (flour, grains, salt, and spices) very well. Once the dough is moist, it's much harder to mix it well. |
 | Now we add the olive oil and vinegar to the dough. (Vinegar makes the flavor more intense, and with some oil the bread will remain fresh for 5-7 days.) We'll only use half of the water to start with. While kneading, we pay attention to the consistency of the dough. Only keep adding water until none of the ingredients in the bowl are dry anymore; the dough shouldn't stick to the side of the bowl. We don't want our loaf to melt in the oven and become flatbread. |
 | Even if you used the food processor, the dough now has to be kneaded by hand. Knead it until there are no more air pockets trapped inside. Then shape the bread into a loaf. The surface should be smooth and free of cracks. |
 | Now place the loaves in the oven at 120° F (50° C) for 45 minutes. Since the yeast has run out of carbohydrates to feed it by now, the loaf probably will not grow much more. But a little is still active in the dough, making our bread light. Here, too, putting a dish towel over the dough will protect it from drying out. |
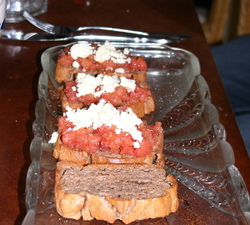
 | At last, it's time to bake the bread (this time without a dish towel!). We'll heat the oven to 400° F (180-200° C), and in 60-75 minutes (depending on how large and compact the loaf is) we can take the finished bread out of the oven. If you like an extra-crispy crust, heat the oven to 440° F (225° C) for some minutes. Wait 2-3 hours or until the bread is completely cool to slice it. We try but never quite make it that long, because it smells delicious! |
Comments (0)
Melden Sie sich an, um den Artikel zu kommentieren